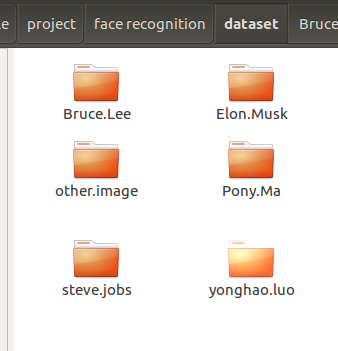
3.15必应网站爬取清的人脸图片

摘要

本文主要记录自己动手做人脸识别数据集的整个过程,识别的过程主要分别使用了3中方法实现。

    1. 爬虫必应
    1. 根据关键词爬取关键词对应的人名
    1. 跳转必应显示的人物缩略图到高清原图链接地址
    1. 透过opencv的HAAR检测器,定位人脸
    1. 保存人脸部分的像素图片

这个代码较之前的一个版本代码的不同之处在于,这个代码,爬虫的是高清的原图,并且本次代码只保存有用的人脸像素部分,没有把所有的高清原图直接下载下来,避免浪费硬盘资源,也便于后面做人脸识别中人脸有用信息的提取。

  • [x] Edit By Porter, 积水成渊,蛟龙生焉。

一、爬虫高清图片

1
2
3
4
5
6
7
8
9
10
11
12
13
14
15
16
17
18
19
20
21
22
23
24
25
26
27
28
# 找到图片的链接
def FindLink(self, PageNum):
for i in range(3, PageNum):
num_disp_k = 0
# print("当前读取图片第: %d 页"%i)
# try:
if True:
url = 'http://cn.bing.com/images/async?q={0}&first={1}&count=35&relp=35&scenario=ImageBasicHover&datsrc=N_I&layout=RowBased_Landscape&mmasync=1&dgState=x*188_y*1308_h*176_c*1_i*106_r*24'
# 定义请求头
agent = {
'User-Agent': "Mozilla/5.0 (X11; Linux x86_64) AppleWebKit/537.36 (KHTML, like Gecko) Chrome/77.0.3865.120 Safari/537.36"
}
page1 = urllib.request.Request(url.format(self.search_keyword, i * 35 + 1), headers=agent)
page = urllib.request.urlopen(page1)
# 使用beautifulSoup进行解析网页
soup = BeautifulSoup(page.read(), 'html.parser')
# print(urllib.request.urlopen(page1).read().decode('utf-8'))
# 创建文件夹
if not os.path.exists(self.save_path):
os.mkdir(self.save_path)

# print(soup.select('.iusc'))

for StepOne in soup.select('.iusc'):
link = eval(StepOne.attrs['m'])['murl']# 这个链接地址就是高清图片的链接地址。
num_disp_k = len(os.listdir(self.save_path)) + 1
self.get_head_image(link, num_disp_k) ## 这个函数是后面通过OPENCV提取人脸部分后,保存到电脑的头像图片
print("输出第 %d 轮:%d 张图片" %(i, num_disp_k), '\n', self.search_keyword, '\t', num_disp_k, link, end='\n')

二、提取高清头像图片并保存

1
2
3
4
5
6
7
8
9
10
11
12
13
14
15
16
17
18
19
20
21
22
23
def get_head_image(self, urlimage, num_disp_k):
cap = cv2.VideoCapture(urlimage)
ok, origin_image = cap.read()
if ok:
path = '/home/porter/opencv-3.4.3/data/haarcascades/'
# 告诉OpenCV使用人脸识别分类器
classfier = cv2.CascadeClassifier(path + "haarcascade_frontalface_alt2.xml")
grey = cv2.cvtColor(origin_image, cv2.COLOR_BGR2GRAY) # 将当前桢图像转换成灰度图像

# 人脸检测,1.2和2分别为图片缩放比例和需要检测的有效点数
faceRects = classfier.detectMultiScale(grey, scaleFactor=1.2, minNeighbors=3, minSize=(32, 32))

if len(faceRects) > 0: # 大于0则检测到人脸
for faceRect in faceRects: # 单独框出每一张人脸
x, y, w, h = faceRect
# 将当前帧保存为图片
img_name = '%s/%d.jpg' % (self.save_path, num_disp_k)
image = origin_image[y - 10: y + h + 10, x - 10: x + w + 10]
cv2.imwrite(img_name, image)
time.sleep(0.2)
cap.release()
else:
print("urlimage错误:", urlimage)

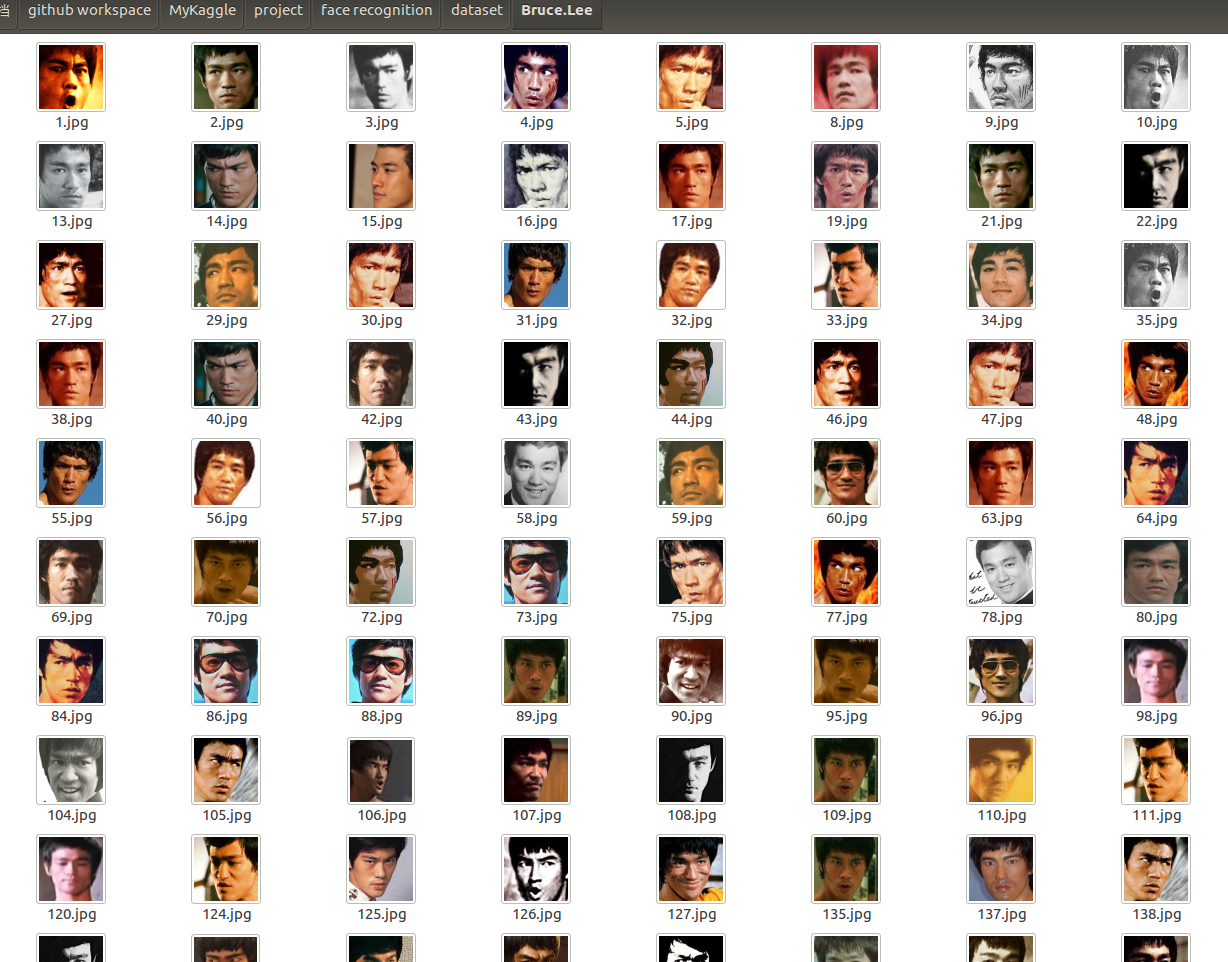
保存在本地的部分人脸照片集

三、完整的程序代码

1
2
3
4
5
6
7
8
9
10
11
12
13
14
15
16
17
18
19
20
21
22
23
24
25
26
27
28
29
30
31
32
33
34
35
36
37
38
39
40
41
42
43
44
45
46
47
48
49
50
51
52
53
54
55
56
57
58
59
60
61
62
63
64
65
66
67
68
69
70
71
72
73
74
75
76
77
78
79
80
81
82
83
84
85
86
87
88
89
90
91
92
93
94
95
96
97
98
99
100
101
102
103
104
105
106
107
108
109
110
111
112
113
114
115
116
117
118
119
120
121
122
123
124
125
126
127
128
129
130
131
132
133
134
135
136
137
138
139
140
141
import urllib
import requests
import os
import sys
import time
from bs4 import BeautifulSoup
import cv2

## 获取高清的关键人图片,然后抠出头像的部分,保存到本地路径。

save_path_S = '../dataset/yonghao.luo/' # 设置图片保存的路径
search_keyword_S = '罗永浩' # 设置需要从必应网站检索的关键词

class CrawlersExtractiveImage:
def __init__(self, save_path, search_keyword):
self.save_path = save_path # 图片保存的本地路径
self.search_keyword = urllib.parse.quote(search_keyword) #从必应搜索图片的关键词
self.save_people_name = self.save_path.split('/')[-2]
# 识别出人脸后要画的边框的颜色,RGB格式
self.rectanglecolor = (0, 255, 0)
print("web spider for same of people's picture!", end='\r')

# 从得到的图片链接下载图片,并保存
def SaveImage(self, image_link, image_cout):
'''

:param image_link: 将要存储的图片链接
:param search_keyword: 图片的关名字
:param image_name: 图片的id编号
:return:
'''
try:
urllib.request.urlretrieve(image_link, self.save_path + self.save_people_name + str(image_cout) + '.jpg')
time.sleep(1)
except Exception:
time.sleep(1)
print("产生未知错误,放弃保存", end='\r')
else:
print("图+1,已有" + str(image_cout) + "张图", end='\r')
def Save_image_2(self, image_link, image_cout):
s = requests.session()
headers = {
'Accept': 'text/html,application/xhtml+xml,application/xml;q=0.9,image/webp,image/apng,*/*;q=0.8,application/signed-exchange;v=b3',
'User-Agent': 'Mozilla/5.0 (X11; Linux x86_64) AppleWebKit/537.36 (KHTML, like Gecko) Chrome/77.0.3865.120 Safari/537.36'
}
s.headers.update(headers)
# image_link = 'http://www.gstatic.com/tv/thumb/persons/487130/487130_v9_ba.jpg'
html = s.get(url=image_link, timeout=20)
# print(html.text)
path = self.save_path + self.save_people_name + str(image_cout) + '-.' + image_link.split('.')[-1]
with open(path, 'wb') as file:
file.write(html.content)
file.close()
print("文件保存成功", '\n', '\n', end='\r')
time.sleep(3)


# 找到图片的链接
def FindLink(self, PageNum):
for i in range(3, PageNum):
num_disp_k = 0
# print("当前读取图片第: %d 页"%i)
# try:
if True:
url = 'http://cn.bing.com/images/async?q={0}&first={1}&count=35&relp=35&scenario=ImageBasicHover&datsrc=N_I&layout=RowBased_Landscape&mmasync=1&dgState=x*188_y*1308_h*176_c*1_i*106_r*24'
# 定义请求头
agent = {
'User-Agent': "Mozilla/5.0 (X11; Linux x86_64) AppleWebKit/537.36 (KHTML, like Gecko) Chrome/77.0.3865.120 Safari/537.36"
}
page1 = urllib.request.Request(url.format(self.search_keyword, i * 35 + 1), headers=agent)
page = urllib.request.urlopen(page1)
# 使用beautifulSoup进行解析网页
soup = BeautifulSoup(page.read(), 'html.parser')
# print(urllib.request.urlopen(page1).read().decode('utf-8'))
# 创建文件夹
if not os.path.exists(self.save_path):
os.mkdir(self.save_path)

# print(soup.select('.iusc'))

for StepOne in soup.select('.iusc'):
link = eval(StepOne.attrs['m'])['murl']
num_disp_k = len(os.listdir(self.save_path)) + 1
# link = 'http://tse2-mm.cn.bing.net/th?' + link.split('?')[1]
self.get_head_image(link, num_disp_k)
# try:
# self.get_head_image(link, str(num_disp_k))
# except:
# print("存储错误:",link)
print("输出第 %d 轮:%d 张图片" %(i, num_disp_k), '\n', self.search_keyword, '\t', num_disp_k, link, end='\n')
# except:
# print('URL OPENING ERROR !', end='\r')
def get_head_image(self, urlimage, num_disp_k):
cap = cv2.VideoCapture(urlimage)
ok, origin_image = cap.read()
if ok:
path = '/home/porter/opencv-3.4.3/data/haarcascades/'
# 告诉OpenCV使用人脸识别分类器
classfier = cv2.CascadeClassifier(path + "haarcascade_frontalface_alt2.xml")
grey = cv2.cvtColor(origin_image, cv2.COLOR_BGR2GRAY) # 将当前桢图像转换成灰度图像

# 人脸检测,1.2和2分别为图片缩放比例和需要检测的有效点数
faceRects = classfier.detectMultiScale(grey, scaleFactor=1.2, minNeighbors=3, minSize=(32, 32))

if len(faceRects) > 0: # 大于0则检测到人脸
for faceRect in faceRects: # 单独框出每一张人脸
x, y, w, h = faceRect
# 将当前帧保存为图片
img_name = '%s/%d.jpg' % (self.save_path, num_disp_k)
image = origin_image[y - 10: y + h + 10, x - 10: x + w + 10]
cv2.imwrite(img_name, image)
time.sleep(0.2)

# # 画出矩形框
# cv2.rectangle(origin_image, (x - 10, y - 10), (x + w + 10, y + h + 10), self.rectanglecolor, 2)
#
# # 显示当前捕捉到了多少人脸图片了,这样站在那里被拍摄时心里有个数,不用两眼一抹黑傻等着
# font = cv2.FONT_HERSHEY_SIMPLEX
# cv2.putText(origin_image, 'num:%d' % (num_disp_k), (x + 30, y + 30), font, 1, (255, 0, 255), 4)
# 显示图像
# cv2.imshow("get head image", origin_image)
cap.release()
# time.sleep(5)
cv2.destroyAllWindows()
# c = cv2.waitKey(10)
# if c & 0xFF == ord('q'):
# time.sleep(0.3)
# cap.release()
# cv2.destroyAllWindows()
# return
else:
print("urlimage错误:", urlimage)


if __name__=='__main__':
#输入需要加载的页数,每页35幅图像
PageNum = 15 # 需要加载多少页
app = CrawlersExtractiveImage(save_path_S, search_keyword_S)
app.FindLink(PageNum)

下面这个是爬虫李小龙的高清,面部图像

必应网站爬虫李小龙

文章目录
  1. 1. 摘要
    1. 1.1. 一、爬虫高清图片
    2. 1.2. 二、提取高清头像图片并保存
    3. 1.3. 三、完整的程序代码
|